Friday, December 28, 2012

Oaxacan Christmas Tamales


One of the most important and fascinating parts of the Christmas season are the many traditions passed down through generations of families and cultures. Around my house we are pretty run of the mill. Christmas Eve church service, presents Christmas morning (now that we don't have any little kids the stockings have gone by the wayside although I'd like to borrow a friend's family tradition next year where all the adult family members pull names and take turns each year filling stockings for each other), a nice but casual dinner with our small extended family in the afternoon. It's a very laid back affair which works for us. Occasionally though I'm jealous of those who have something more unique. I have been aware for some time that Christmas is Tamale making season in the Mexican culture. Early in the fall I was talking to my coworker Sandra who has a large family from Oaxaca, Mexico. It crossed my mind to ask, "does your mom make Tamales at Christmas?" She in fact did although not every year. At my urging she talked her mom into teaching me and the rest is photographed here!

As soon as I arrived one of the biggest plastic bowls I have ever seen was brought out and three 5lb bags of corn flour were poured in, for every bag of flour 1 Tablespoon of baking powder added, then the tub of lard (4 lbs) salt & sugar  (over time I estimate she added about 2-3 cups of each, more sugar than salt, but seasoning was done by taste vs measuring) and slowly 3 gallons of water worked in creating the masa dough.
Because I'm me I couldn't just sit around and watch, I was here to get my hands dirty! I wanted to contribute! And so I was allowed my turn at the mixing bowl.
I knew it wouldn't be easy and I was determined to work my arm to the bone but I was disappointed with how quickly I burned out compared to Sandra's mom! As I worked my arm around and around searching out little lumps with my hand and trying my best not to shove the whole thing off the table while rotating it I wondered how the little older woman could push through the dough so hard! The thing I quickly noticed when I relinquished my turn was the shoving motion she was using with the heel of her hand from the outer rim to the center of the bowl. I had been trying too hard to mix by gripping handfuls and using my fingers (which I would pay for later the next two days my hand has never hurt like that before) The key to her success was much more of a kneading motion. The one thing I realize now that I neglected to take a picture of was the very important step of taking a pinch of the masa and seeing it floats in a glass of water. If the piece floats it is at the right consistency. Ours floated on the first try (which Sandra claimed never happens). However that was the easiest it would get, from there construction got a little.... sticky....

 There are two important features that set Oaxacan tamales apart from the ones you may have had before, #1 they are wrapped in Banana leaves instead of the typically seen corn husks, #2 the meat filling is mixed with delicious flavorful Mole (a spice and chocolate based sauce) adding incredibly dynamic flavor. We each filled bowls with masa, mole, and a blend of chicken & pork meat which had been cooked tender earlier and torn into small pieces. Through out it was hard to not continuously nibble on pieces of meat dipped in the rich deep mole! A large bowl of the banana leaves that had been soaked earlier to soften was placed in the middle and we got to work!
With a paper towel we would wipe the moisture off a chosen piece of banana leaf (most about 8in x 11in like a standard piece of printer paper, although each slightly unique in size) then from edge to edge we would spread the masa over the entire leaf. I learned quickly after my first one not to get too heavy handed with the masa as they become harder to roll and more likely to crack the thicker it is. In the center roughly a quarter cup of the shredded meat is piled on which a healthy spoonful on mole is poured. Additional mole is dripped over the rest of the masa for added flavor. From there we fold the bottom third up over the meat, the top third down over that and the two sides are folded in to create the complete packet. It is then tied with a thin strip of the banana leaf and set aside to be steamed. Sounds easy enough right?
It was easy until we notice an unfortunate trend. Many of the leaves were cracking as soon as we folded them. It was debated whether they were harvested to old or maybe needed to soak longer, with many we found it easiest to double wrap and extra smaller strip around to keep too much of the masa from oozing out. It was often tricky to get a strip that was pliable enough to tie but we all did the best we could.
Once we had used up all the prepared banana leaves a wire bed was placed in a large pot and water filled to the bed which is then covered with corn husks and the tamales piled on top. From there they steam for an hour and a half. Although ours might not have been the prettiest- they were by far the tastiest I have ever tried. The sweet masa blending with the smoky spiciness of the mole and the tender meat was delectable. I don't think the regular store bought tamales will ever cut it again for me and I hope to be able to make lots more next year!


Monday, December 10, 2012

Sweet and Savory Quiche


There is something really comforting about warm quiche. The flaky crust, the soft custardy egg filling, and the nice breaks in texture from whatever delicious mix in's you have chosen. Last Saturday I had the whole day to cook but hadn't seen any recipes recently that I was overwhelmed to try. I decided it was time to ask Julia for some inspiration. I pulled out the copy of Mastering the Art of French Cooking that my Grandma had passed down to me some years ago and began to browse. I'm not sure what lead me to the section on quiches but it suddenly felt so right. The weather was cold and rainy and a nice warm quiche sounded like a day well spent. The interesting thing about the way Julia Child and Simone Beck laid out the Art is that each section starts with some main techniques and then breaks down into variations of the recipe. Feeling creative I decided to take bits and pieces here and there and create my own recipe from their advice. After Saturdays effort I found a few changes I wanted to make and tried again this Saturday (the fruits of my labor going to my parents house to be consumed because really eating quiche every meal for two weeks just was too much)
 Here is the recipe for my Bacon Apple & Gruyere Sweet & Savory Quiche!

For Pastry Dough:

1 1/2 Cups All Purpose Flour
1/4 tsp Salt
2 pinches of Sugar
2 TblSp Shortening cold
1 3/4 Sticks unsalted Butter (3/4 cup) cold
4-6 TblSp ice Water

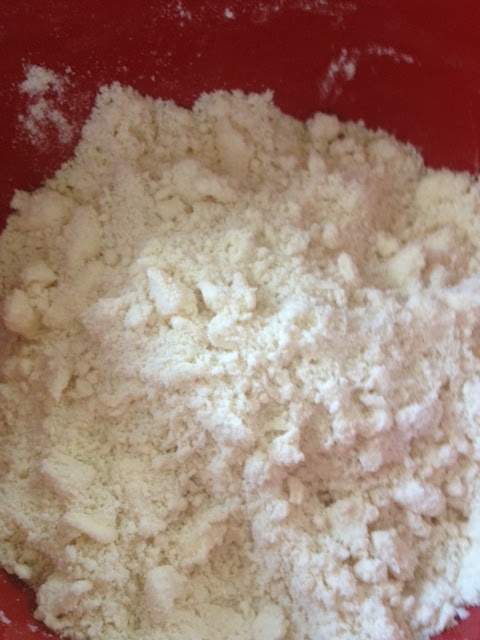
In a medium bowl add small chunks of butter to the flour, salt and sugar blending gently with your fingers by smooshing the pieces in to the flour. When all the butter has been incorporated and resembles oatmeal (as Julia described it) add the shortening with similar finger movements. Slowly the flour and fats will begin to cling together.

Once incorporated add tablespoons of ice water one at a time till you can form a disc with the dough. Wrap the disc in plastic wrap and refrigerate it for no less than 1 hour no more than 24 (it will start to dry out). Chilling it helps the fats solidify and bind with the flour and that's what gives you a nice flaky crust. During this time you can preheat your oven to 400 degrees F.

 After the hour is up take 2 sheets of wax paper and lightly flour the bottom one, place your disc of dough on the flour and sprinkle some additional on top then cover with the second sheet of wax paper. gently roll out into a circle about an 1/8 of an inch thick. Gently transfer to your pie dish (Julia suggests rolling it onto your rolling pin and using that to transfer and unroll on your dish. This has never worked for me but maybe you are more coordinated!). Gently fold over the edges so they are uniform and the outer edge a little thicker. You can use your fingers or a fork to crimp the edge of the dough over the plate for a decorative look.

 Line the dough with a sheet of aluminum foil and fill with your choice of pie weight (I used dry beans). Bake in the oven for 10 minutes. Remove from the over and remove the foil and weight, pierce the inner crust all over with a fork (this will help keep the crust from bubbling on the second bake) return to the oven for another 5 minutes. Let cool a bit before you add your filling! Lower your oven temp to 350 degrees.

For Filling:

4 oz Diced Pancetta or smoked bacon
1 small/medium sweet yellow onion chopped
2/3 small/medium Fuji or Pink Lady Apple Diced in 1/4 inch pieces
 (any apple that is firm and crisp in texture and equally sweet and tart in flavor is great)
3 whole eggs 2 egg yolks
1 1/2 cups Heavy Whipping Cream
1 tsp Nutmeg
1 tsp Salt
1 tsp pepper (black or white your choice white is a little milder and doesn't show up as flecks in your mix)
1 cup shredded Gruyere separated in half

In a medium sized heavy saute pan over medium heat crisp pancetta or bacon stirring regularly for about 5 minutes. Transfer pieces to a plate with a paper towel leaving the grease in the pan. Lower the stove heat to just above the lowest setting. Remove the pan from the burner and add the chopped onion stirring quickly to incorporate the hot grease without burning the onions. Return to the stove top stirring occasionally for the next 20 minutes allowing the onions to caramelize becoming very soft and sweet.

 After 20 minutes add your diced apple stirring it in to the onions allowing it to soften for 5 minutes. Remove from the heat. In a medium bowl combine eggs, egg yolks, whipping cream and seasonings and whisk together. Next whisk in one half cup of the shredded Gruyere cheese. Lastly fold in your apple & onion mixture. Arrange your crisp pancetta or bacon on the bottom of the crust shell evenly. Slowly pour your egg mixture over the bacon filling the shell. Return the whole thing to your oven that is now 350 for 20 minutes or until there is just a slight wiggle at the center of the filling, remove and turn the heat up to 400. At this time wrap the edges of the crust in foil so that they don't burn and sprinkle the remaining half cup of shredded gruyere over the top. Return to the oven for another 15 minutes until the center no longer jiggles and the top has turned a golden brown.

You can serve it right away while it is still piping hot or later when it cools down. This is a great breakfast, brunch or lunch dish, add a nice peppery salad of Arugula greens lightly dressed with olive oil lemon juice s/p and enjoy!